
By Kathy Rose
It is truly aw inspiring to watch successful contest groomers as they apply their artistry and skills, sculpting show quality dogs into fine works of art. There is always something to learn and we even try emulating these skills on the pets that we groom in our salons.

The reality, however, is that the vast majority of our Bread & Butter pets vaguely resemble their breed standard counterparts. Even if these pets once traveled in high circles, a day comes when their owner wants a short, easy, no frills trim on their beloved pet. For this segment, our model is an aging, overweight Maltese.
Usual preparation work is completed ahead; bath, blow out and brush along with ear cleaning, nail trimming, and trimming of pads and sanitary.
Fig.1) Stand to the rear of the dog and begin clipping just behind the Occipital bone, following coat growth direction.
Fig.2) Clip over the point of rump and down the entire rear leg. Clip over the croup and then approximately one inch down the tail, forming a tail band that is the same length as the body. Support the rear and then clip the undercarriage, from back to front, trimming against coat growth direction.
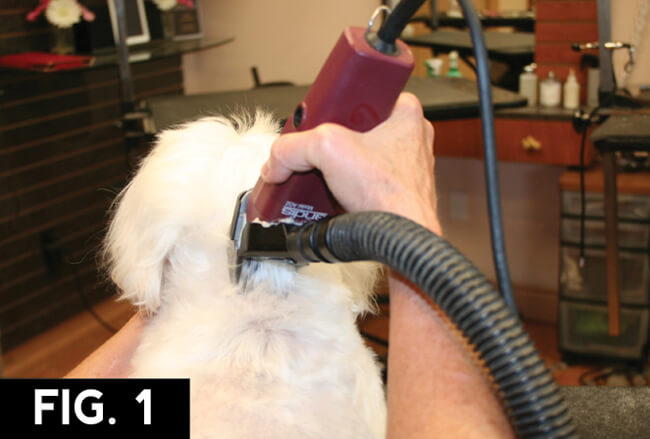
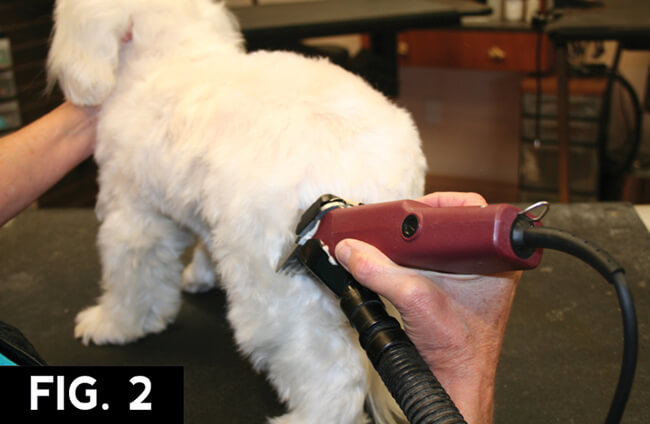
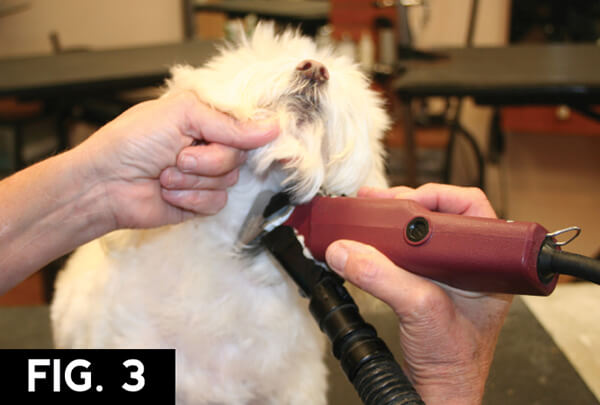
Fig.3) Move to the front of the dog and lifting the head, hold the beard out of the way. Begin clipping at the jaw line, trimming downward over the chest to the undercarriage. Lift the ears and then trim the neck and shoulders beginning just under the ear.
Fig.4) Providing the dog’s back and knees can tolerate it, lift the dog from the front and then trim the undercarriage, trimming against coat growth direction. Trim again, in the opposite direction, following coat growth direction.
Fig.5) Lift the front legs and trim following coat growth direction.
Brush the coat against coat growth direction, (back brush) and then repeat steps 1 – 5.
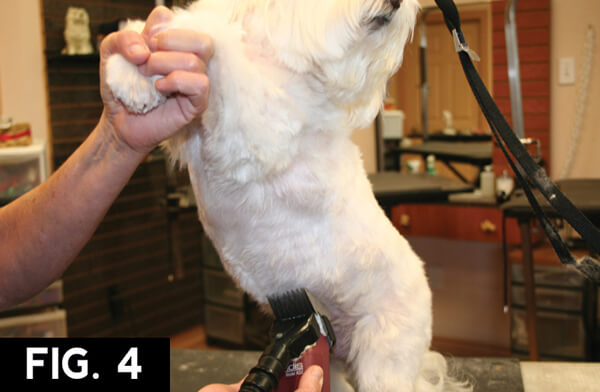
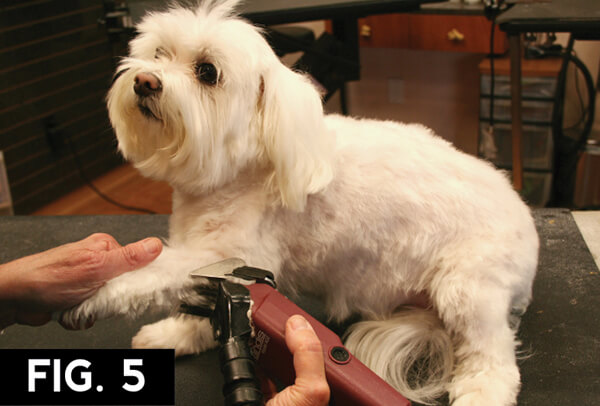
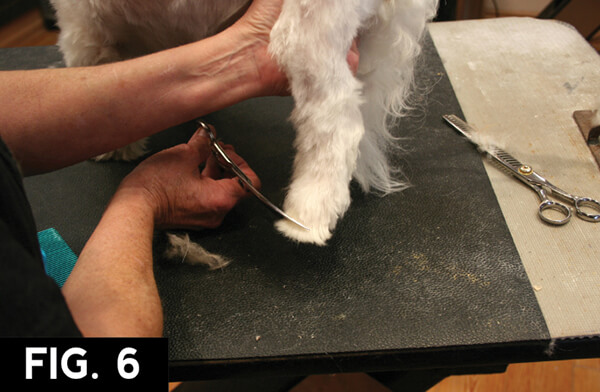
Fig.6) Lift the rear leg slightly, while supporting the knee. Trim around the rear foot.
Fig.7) Use thinning shears to trim the underside of the tail band and blend to the croup.
Fig.8) Comb the coat outward and then use thinning shears to tidy the stray hairs on the rear legs. Blend the “tuck up” area into the undercarriage using thinning shears.
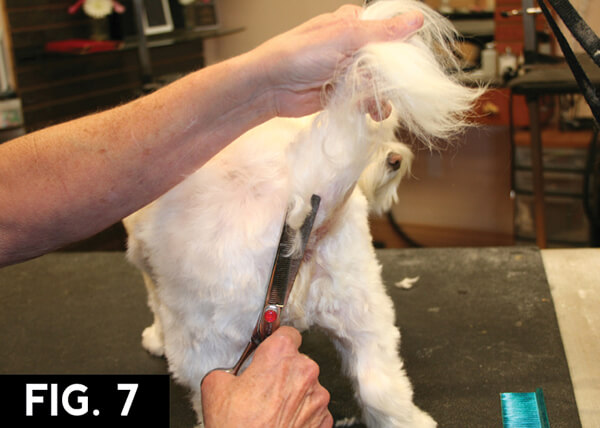
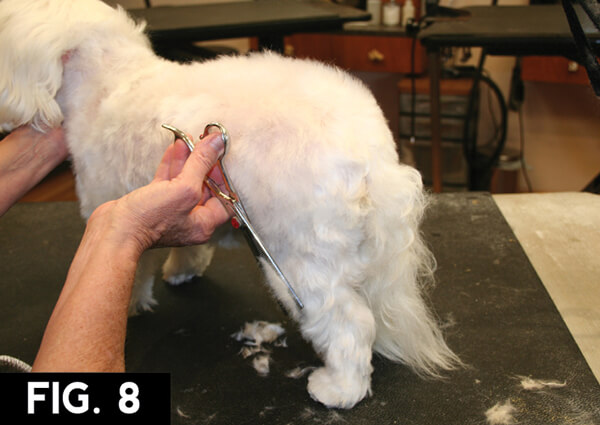
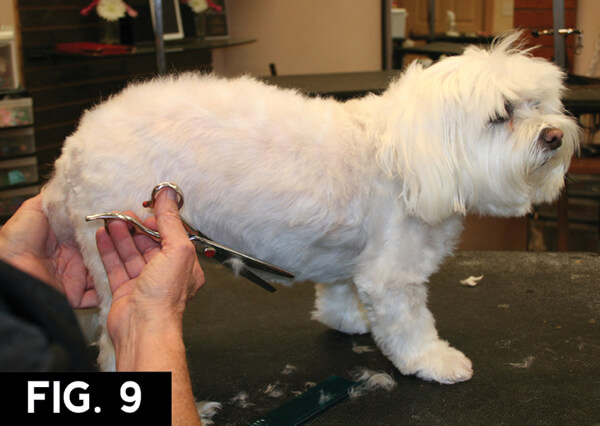
Fig.9) Comb the side coat downward and then trim the undercarriage from the tuck up to between the front legs, then curve upward to the chest.
Fig.10) Move to the front of the dog. Use thinning shears to blend the chest to the neck and throat, making this area shorter than the rest of the body.
Use thinning shears to trim the shoulder and blend it into the foreleg. Blend any lines on the body, left by the clipper, with thinning shears. Stand to the front of the dog and blend the back of the neck onto the topline all the way to the croup, creating a level topline.
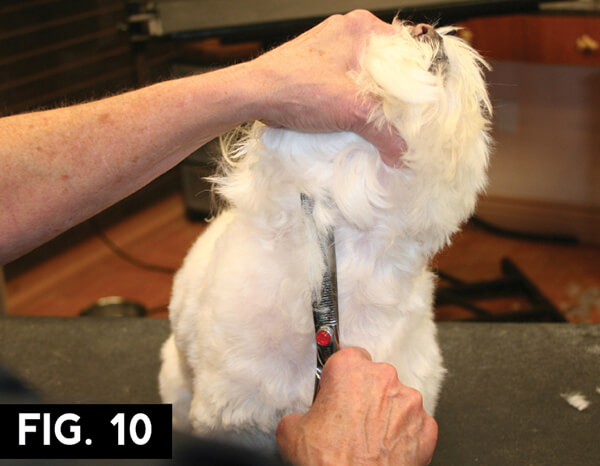
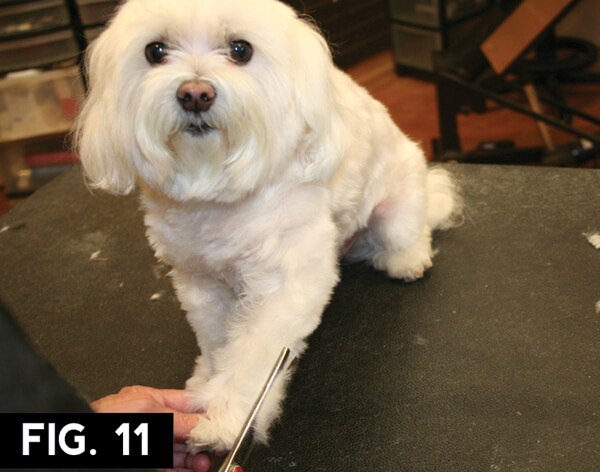
Fig.11) Comb the front leg coat outward. Lift the leg slightly and then trim upward to the elbow using thinning shears. Use curved shears to round the front feet.
Fig.12) Use thinning shears to clean the eye corners. Next comb the brow coat forward and use thinning shears to trim. Place the thinning shears outward at a 45° angle to create a slight overhang. Trim first straight across the front and then from the outside eye corner to the ear.
Fig.13) Grasp the beard and then using thinning shears, trim the beard in a semi circle shape. Begin trimming at the nose, angling downward and then turn upward toward the base of the ear. Trim the other side in reverse by gently securing the muzzle in one hand and with your other hand, trim the semi-circle.
Grasp the top knot coat between your index and middle fingers and then trim straight across using thinning shears.
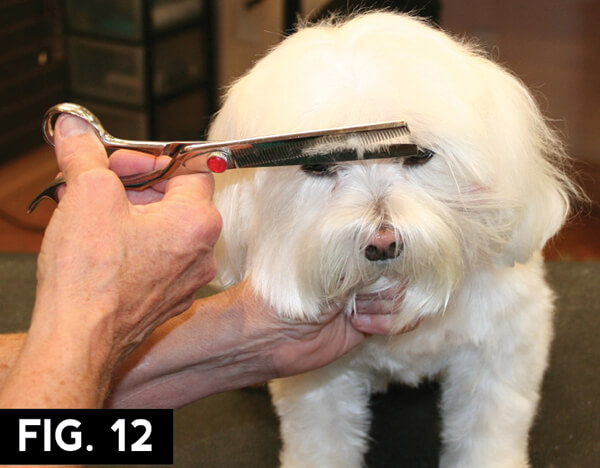
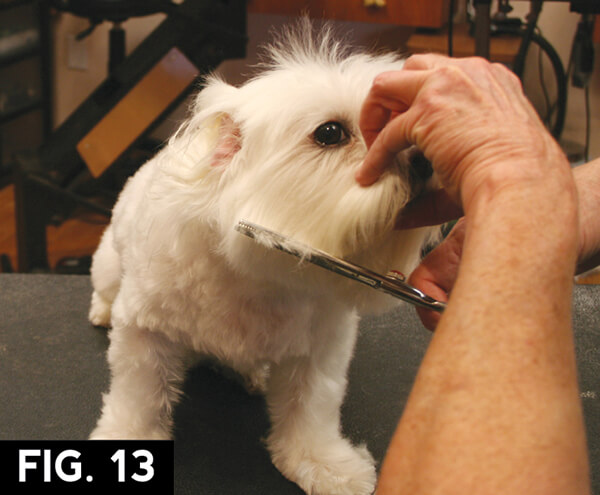
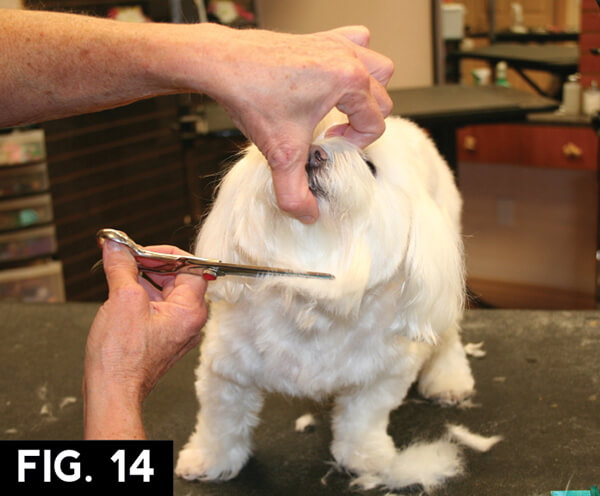


Fig.14) Comb the bottom of the beard coat straight down and then trim. Next, comb the cheek coat outward and blend the bottom of the beard into the cheek coat. Flip the ear back and then trim the coat in front of the ear, (ventilation strip) and then blend into the top knot.
Fig.15) Comb the ear coat downward and with thinning shears or curved shears, trim a rounded shape. Give the head a slight shake and trim again.
Fig.16) Finish up the trim by holding the tail straight back, comb the coat down and use curved shears to trim the ends from the tip to the base in a semi circular flag.

Although, we may not get the artistic satisfaction while grooming fat little (or big) dogs to a short maintenance “puppy cut,” I enthusiastically welcome these clients as they are truly the Bread & Butter of my business!