By Dawn Omboy

Rennie Harper is a cute little bichon mix that is a regular at our salon in Columbus Georgia. He normally gets a no frills easy to care for short clip. On his last visit however, his mom asked about some of the coloring she has seen me do and mentioned that she would like to give Rennie a Panda dye job. Well you know me, this was very exciting! So I discussed it with her and she and her husband really wanted to do it for their granddaughter, Lauren Hill, as soon as Rennie had enough hair to pull off the look.
I arranged for Rennie to come in the day before his color transformation so that I could color test products on him. This way I would know exactly what would work best and to be sure there would be no reaction to the products that were to be used to create this look. Since I would be dying his legs black, I decided to test on his feet the day before the actual groom would take place (Fig 1).

On the following day, Rennie came back in for the actual dye job. This went relatively quickly since I had tested dyes for color quality the day before. I began by looking at different panda photos to make sure the markings were correct.
Next I wrapped his tail in foil to prevent any black dye from getting on it. Then with the help of a small applicator brush and using Cholesterol, I outlined the design, brushing the cholesterol away from the areas to be dyed. This way it acted as a protective border, holding the hair in the opposite direction and out of my way while I applied the dye to the designated areas with the small applicator brush (Fig 2).
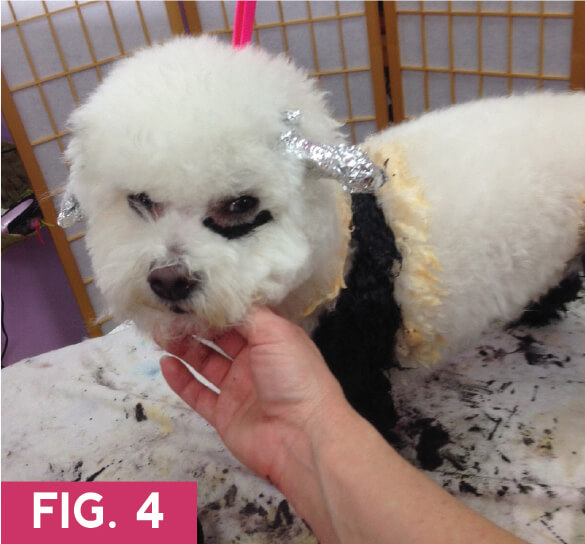
I find it easiest to start from the bottom of the legs and line brush the dye into the coat, working my way up as I go (Fig 3). This helps get a more even coverage. With the panda legs done, I moved on to the head and dyed his ears using the same small applicator brush. I then wrapped them in foil while still needing to set the eye pattern. That would be done by switching to a smaller, firm bristled artist paint brush and underlining the eyes (Fig 4). You can see the white ring around the eye, as you should take care not to get any dyes too close to the dog’s eyes.

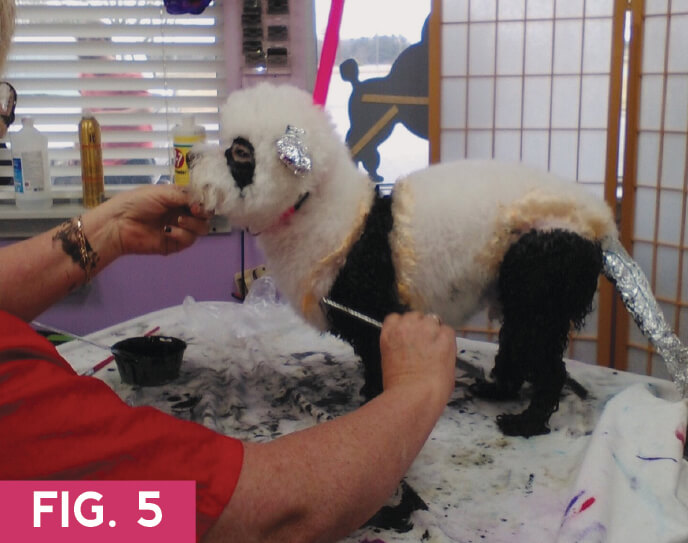
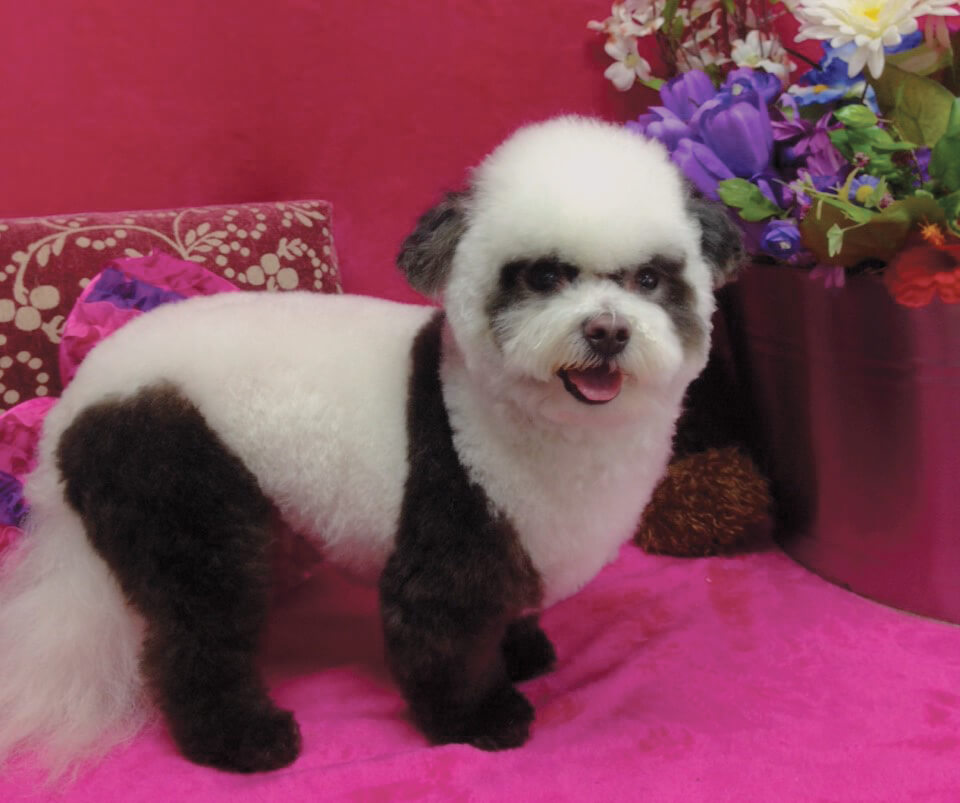
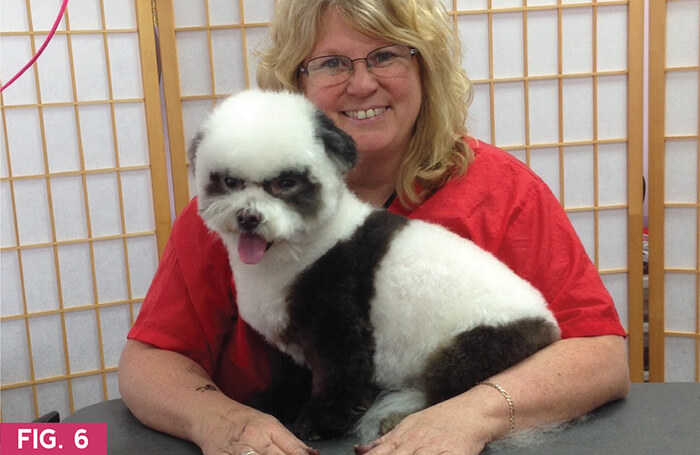
After all dye is applied, carefully comb through with the wide tooth end of your comb to make sure your color is distributed evenly (Fig 5). Then wait approximately 25-30 minutes after the comb through before rinsing. Be sure to shampoo so the remaining color will stay on your dog and not the clients couch! Now just dry and scissor up your cutest little panda ever and he will be ready to make everyone who sees him want to cuddle him (Fig 6).
Rennie the Panda was done to honor Miss Lauren Hill, an incredible young lady with cancer who is leaving a legacy behind. Please check out The Lauren Hill Wings of Hope Foundation to learn more. And visit me, Queen of Color on Facebook. See you next issue and remember, keep making the world more colorful, one dog at a time!
Making the World more Colorful, one dog at a time…
Queen of Color